Now you have to make a checkout setting for your virtual restaurant. SocialMate’s ‘Ecommerce store’ has integrated some online payment methods– PayPal, Stripe, Mollie, Razorpay, Paystack so that your customers can pay via the payment methods easily. Besides, it supports manual payment and cash on delivery systems.
Now you can make a specific checkout setting for a specific store. Action > Checkout settings To make a checkout setting, click on the ‘Checkout settings’ in the ‘Action’ menu at the left side of the store dashboard. Instantly, appear a form that you have to fill up. First, you have to provide your account information for any or some of the online payment methods that you want to enable. Then you have to write down the instruction for manual payment in the text area called ‘Manual Payment Instruction’.
After that, you will get a checkout payment option. From here, you can enable any online payment methods and manual checkout for your store. And ‘Cash on Delivery’ is enabled by default.
After that, you will get the ‘Currency and Label’ option. Here, you have to select the currency of online payment methods, the currency through which the clients will give the payment. For example, if you select USD(Dollar) for PayPal and Stripe, your customers have to pay in Dollars via PayPal and Stripe. Then you will see, in a row, three radio buttons called Right alignment , Two decimal , and Display comma. By placing your mouse cursor on the tooltips, you can see the functionality of these buttons. Then you have to put labels for the ‘Buy Now’ button and Store Pickup title.
Then came the Tax and Delivery charge option. Here, you have to provide the amount of Tax in percentage and delivery charge.
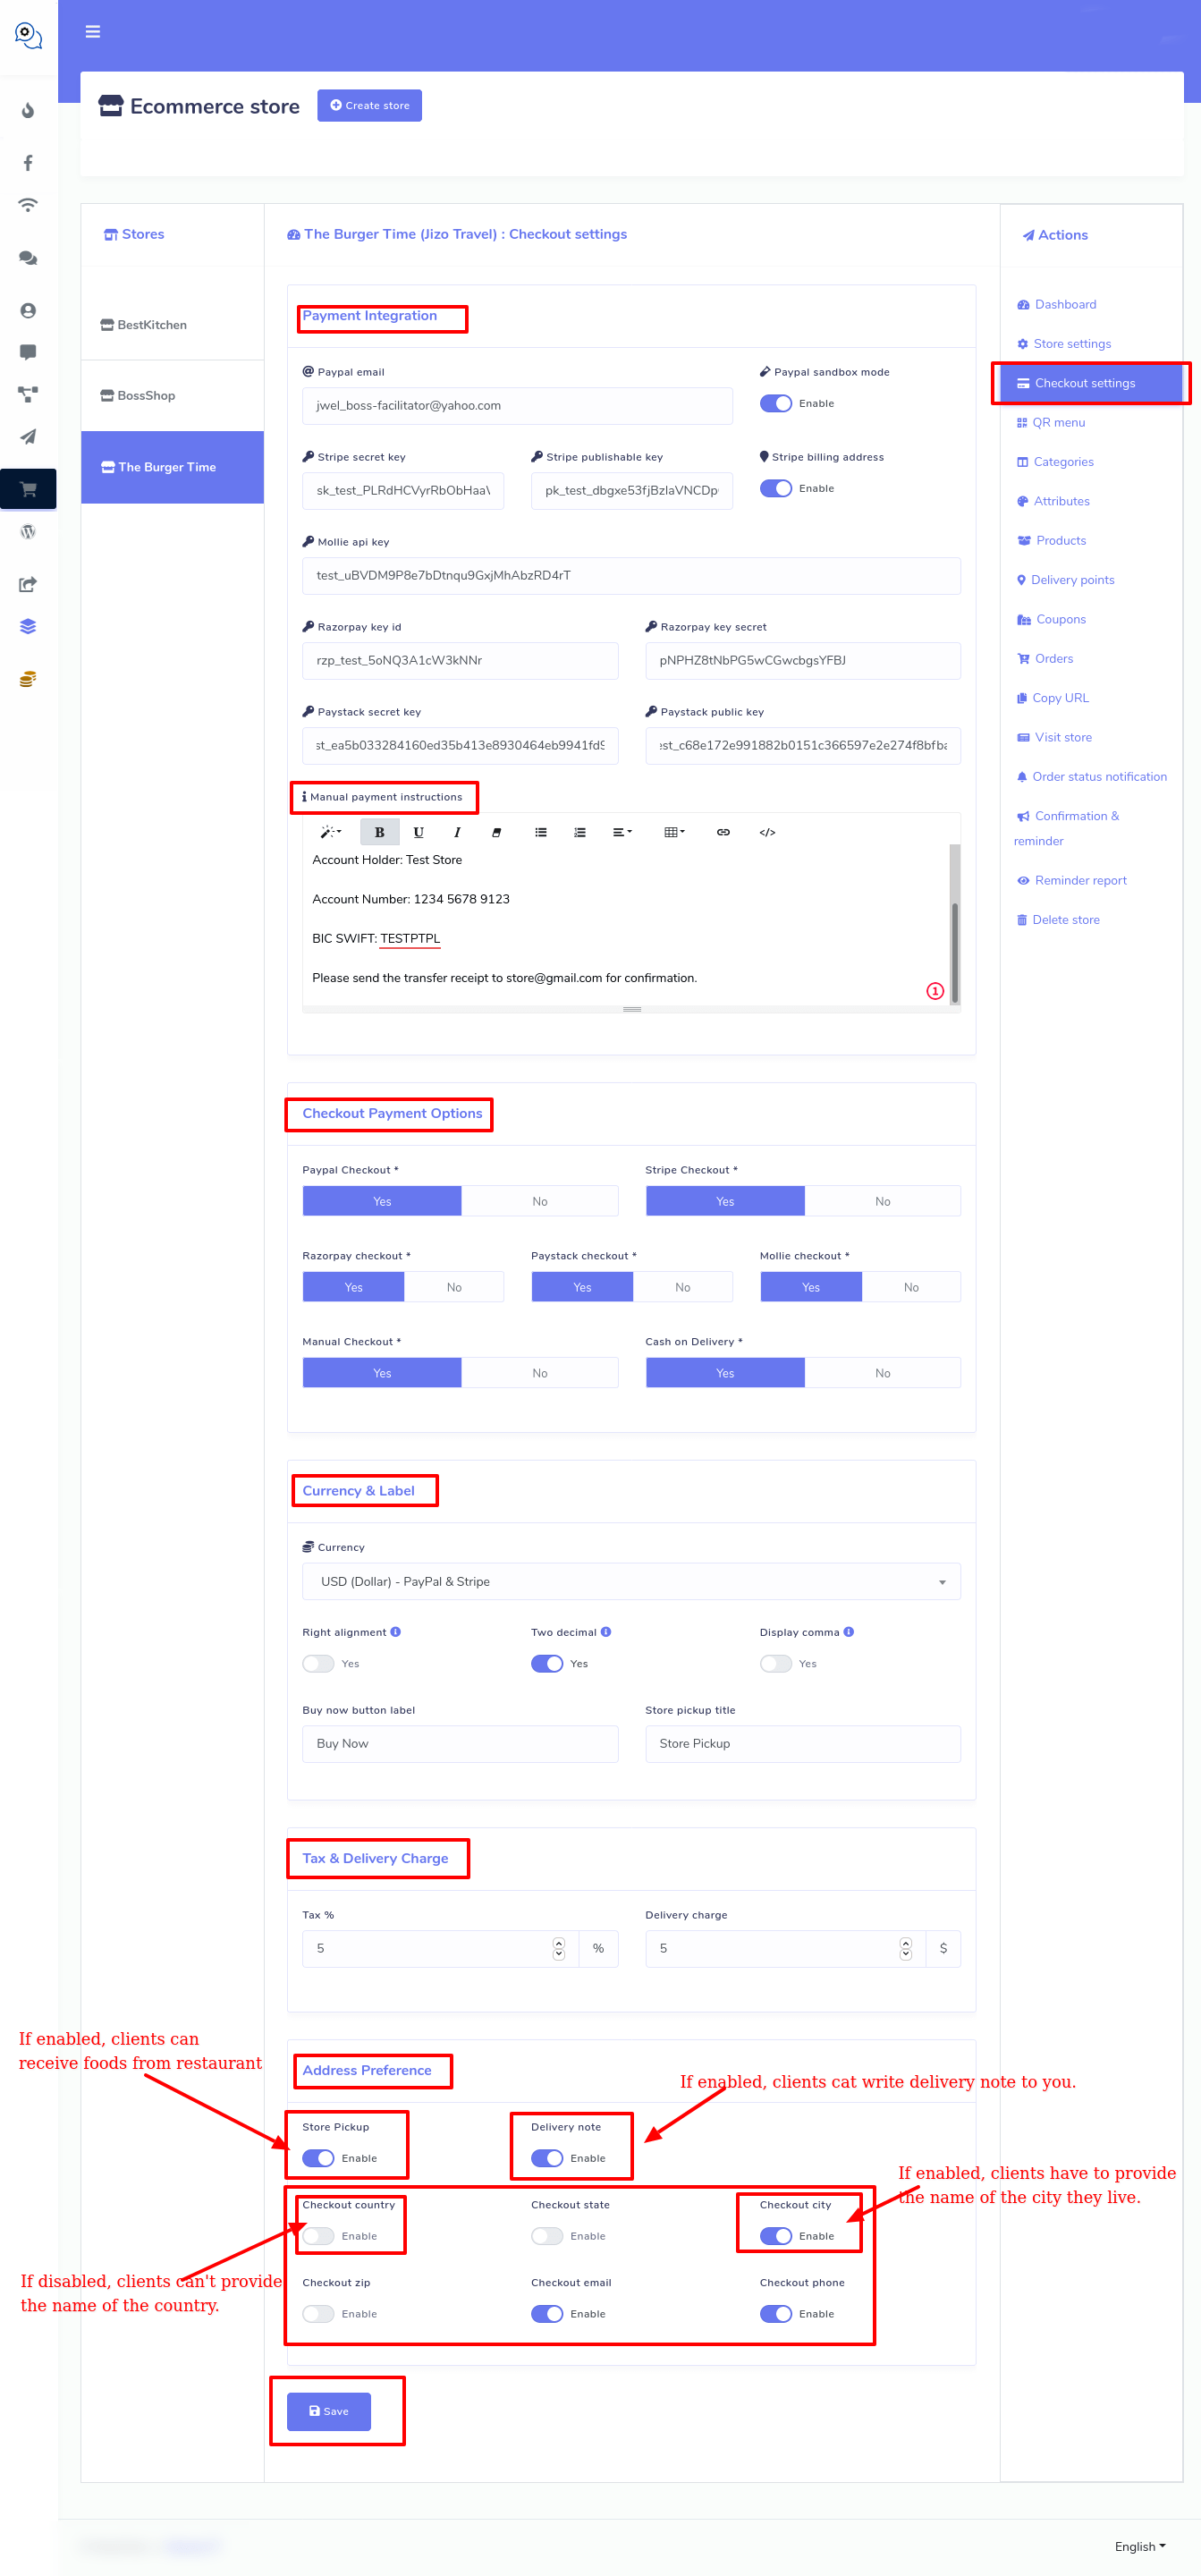
Then comes the address preference area. At first, you see a radio button called Store Pickup. If you enable the button, the clients can give food orders via your virtual restaurant and receive food items sitting at the table of your real restaurant. But if you disable the Store Pickup button, you have to give a delivery address where the food will be delivered. Next to the Store Pickup button, you will see a button called Delivery note . If you enable the ‘Delivery note’, button, your clients will get a text area where they can write a delivery note. In the delivery note, they can tell you how they want the delivery. For example, he can tell that they want the delivery person to wear a mask while delivering the food.
Then come some radio buttons, by disabling and enabling them, you can determine which piece of information your clients have to provide while giving their delivery addresses. The importance of the buttons is that most of the time, you don’t need the country, state, city, and country zip, because you already know the area of your clients. So you don’t need to bother your valued customers to provide his country, state, city and country zip you know beforehand. On the other hand, if you are uncertain of your customers’ area, enable country, state, city, and country zip so that they have to provide them.
After filling out the checkout setting form, click on the Save button and your checkout setting is set.


