In this how-to blog, you will learn how to create a campaign for broadcasting in SocialMate, the world’s best marketing application.
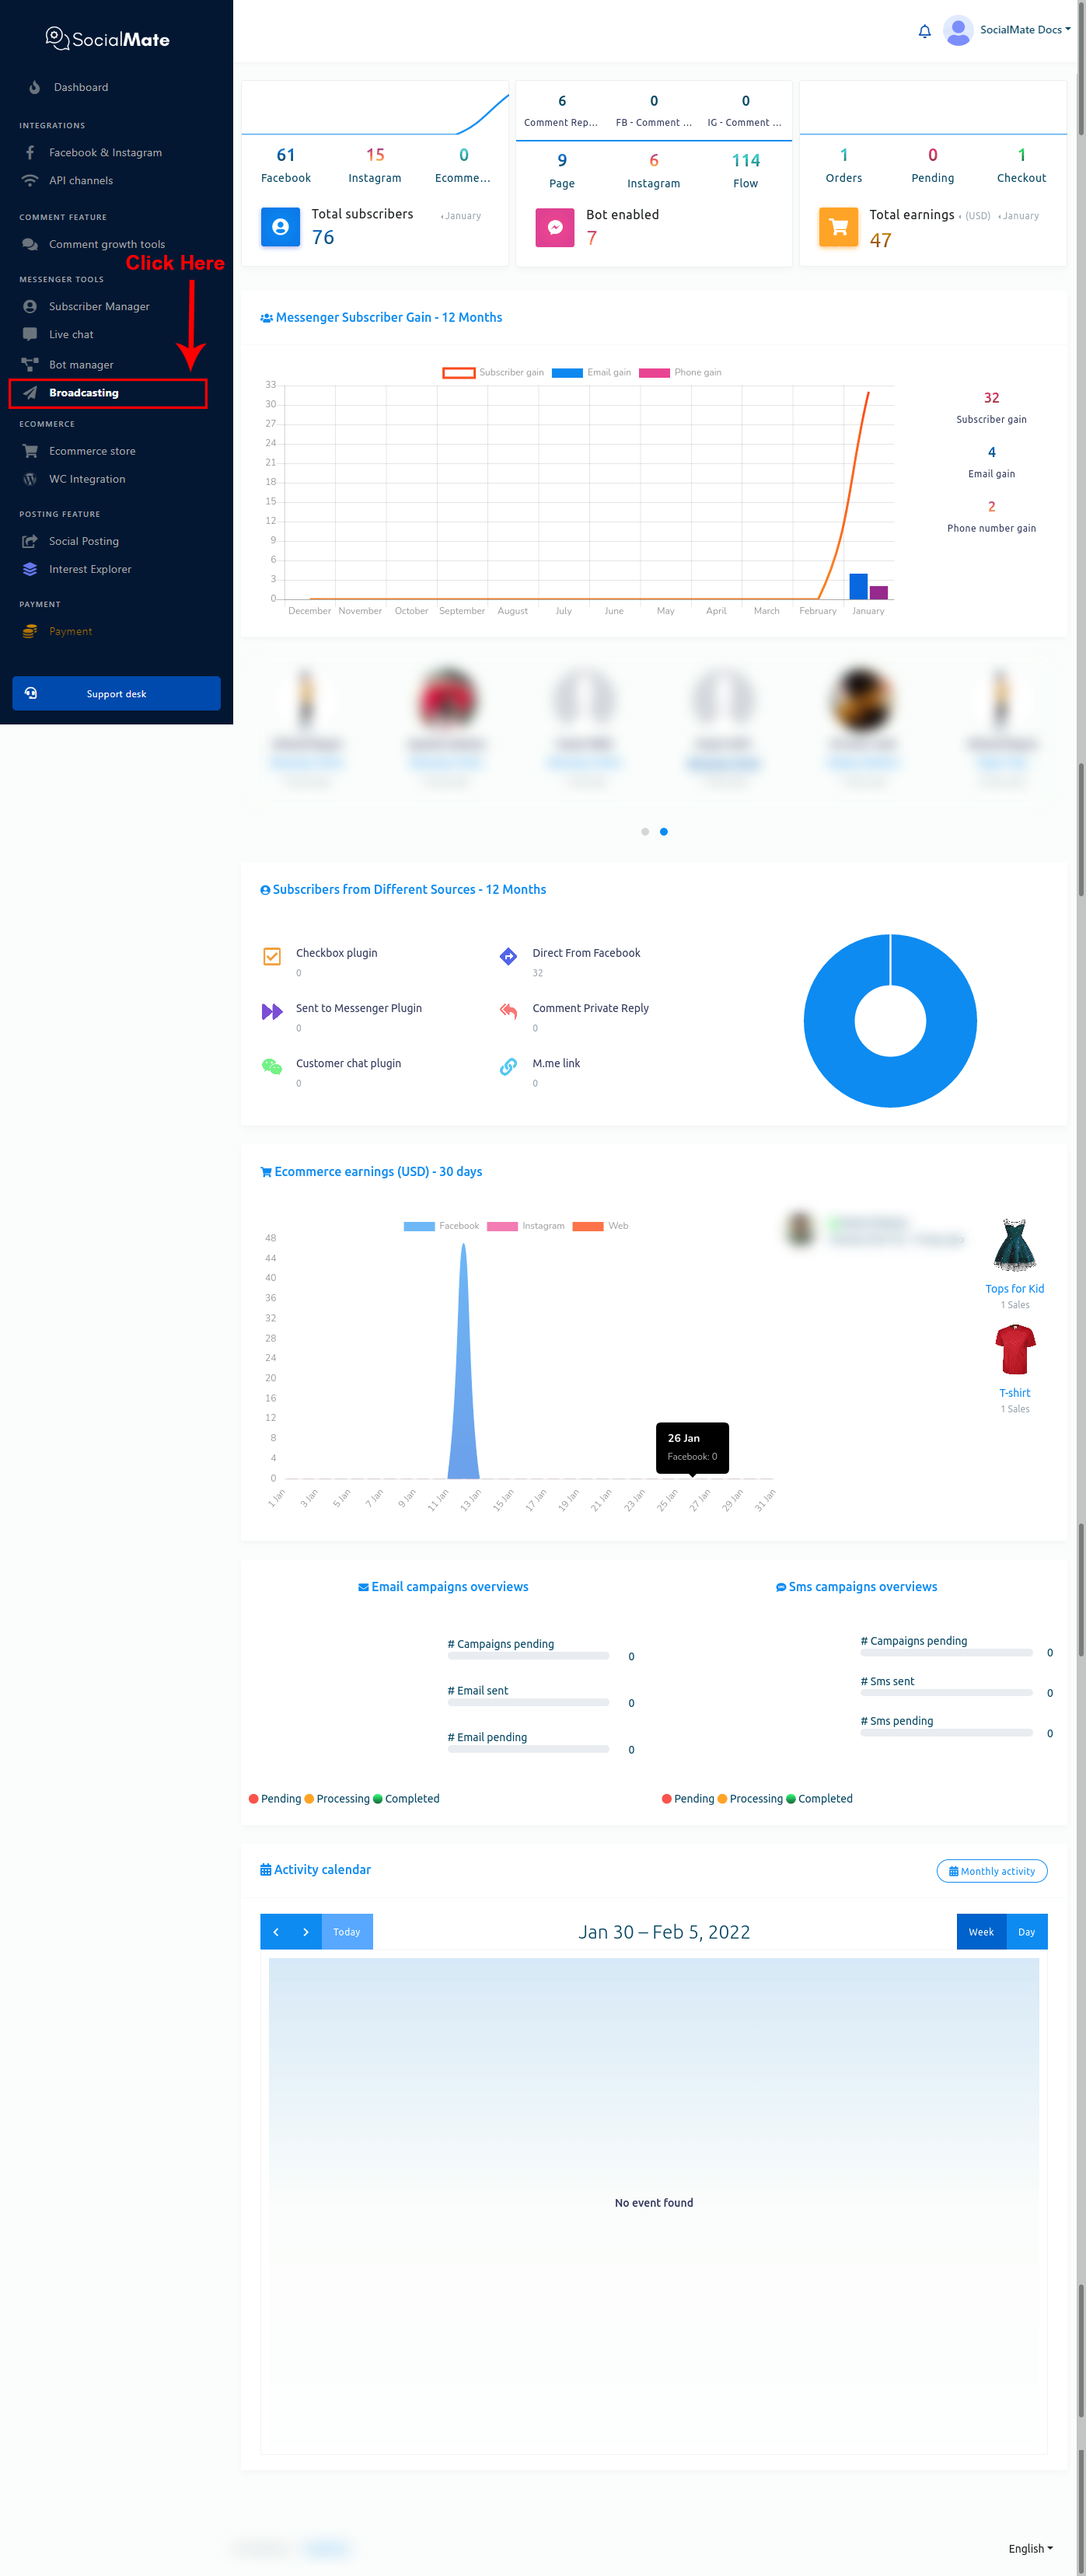
To create a campaign for broadcasting, first, go to the dashboard of SocialMate. Then click on the menu called Broadcasting at the left-sidebar of the dashboard.
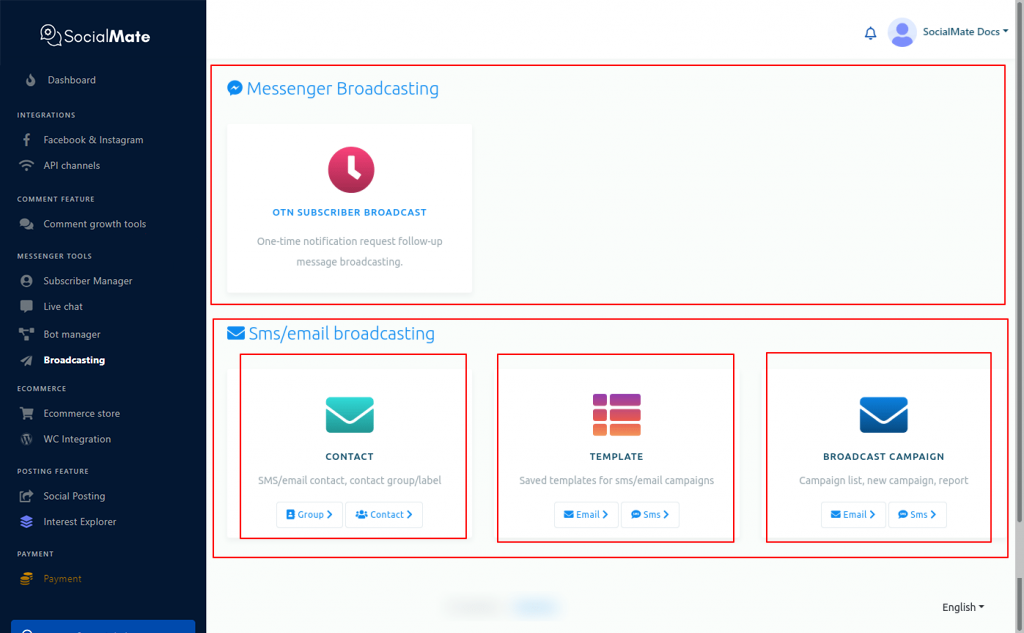
And instantly, will appear a page that is divided into two sections – Messenger Broadcasting and SMS/email Broadcasting. And the SMS/email Broadcasting is divided into three parts — CONTACT, TEMPLATE, and BROADCAST CAMPAIGN.
To create a campaign for Messenger Broadcasting, click on the Messenger Broadcasting option.
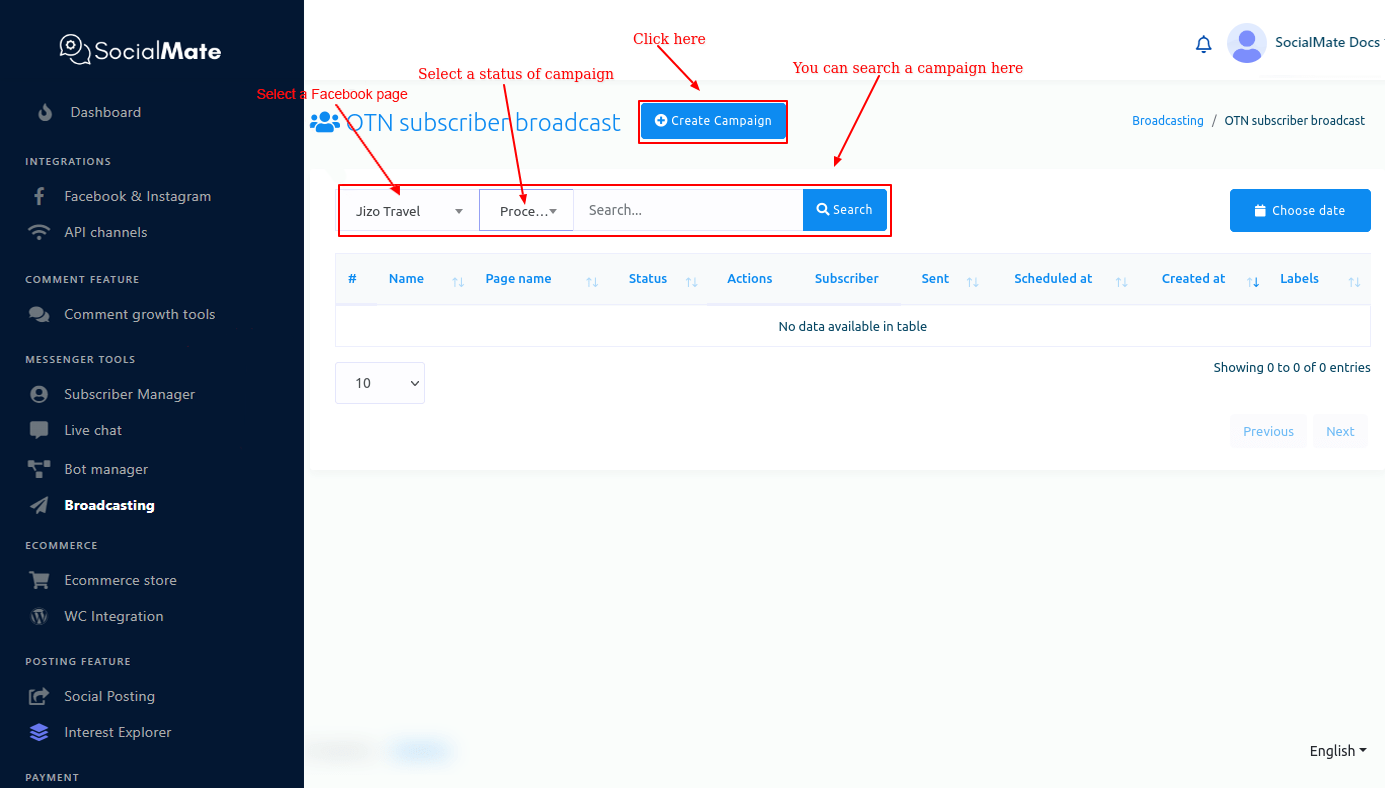
And instantly, a page called OTN subscriber broadcast will appear with a button called create campaign. Now click on the create campaign button.
And instantly, a page called Add OTN subscriber broadcast will appear with an instruction at the top of the page and a form. The form is divided into three parts — Campaign details, Targeting options, Message template.
Please, read the instruction carefully before starting to create the campaign.
Now you have to fill out the form.
First, fill out the Campaign related fields.
Campaign Details
Give a name for the campaign in the campaign name field. After that, select a Facebook page from the select page field.
Then you have to select an OTN postback template from the OTN postback template field. Just click on the OTN postback template field and a drop-down menu of different OTN postback templates will appear. Now select an OTN postaback template from the drop-down menu. Of course, you can select multiple OTN postback templates from the drop-down menu.
Targeting Options
Now come to the Targeting options related fields.
In the field called Target by labels, you can select labels from a drop-down menu of different labels. Of course, you can select multiple labels. The message will be sent to the subscribers who are on these labels. To know more, click on the tooltip button.
You can also select labels in the Exclude by label fields. Of course, you can select multiple labels in the field. The message will not be sent to the subscribers who are on these labels. Moreover, unsubscribe label will be excluded automatically. To know more, click on the tooltip button.
You can also select gender in the gender field. Click on the gender field and a drop-down menu of male and female will appear. From the drop-down menu, select male or female. If you select male, the message will be sent only to the male subscribers. On the other hand, if you select females, the message will be sent only to female subscribers.
In the time zone field, select a time zone. And the message will be sent to the subscribers who live in the selected time zone.
You can also select a locale in the locale field. Just click on the locale field, a drop-down menu of different locales will appear. Now select a locale from the drop-down menu. The message will be sent to the people who fall in the selected locale.
Message Template
Now come to the message templated related fields.
In the select message type field, you can select a message type. Click on the field and a drop-down menu of different message type will appear. From the drop-down menu, you have to select a message type.


