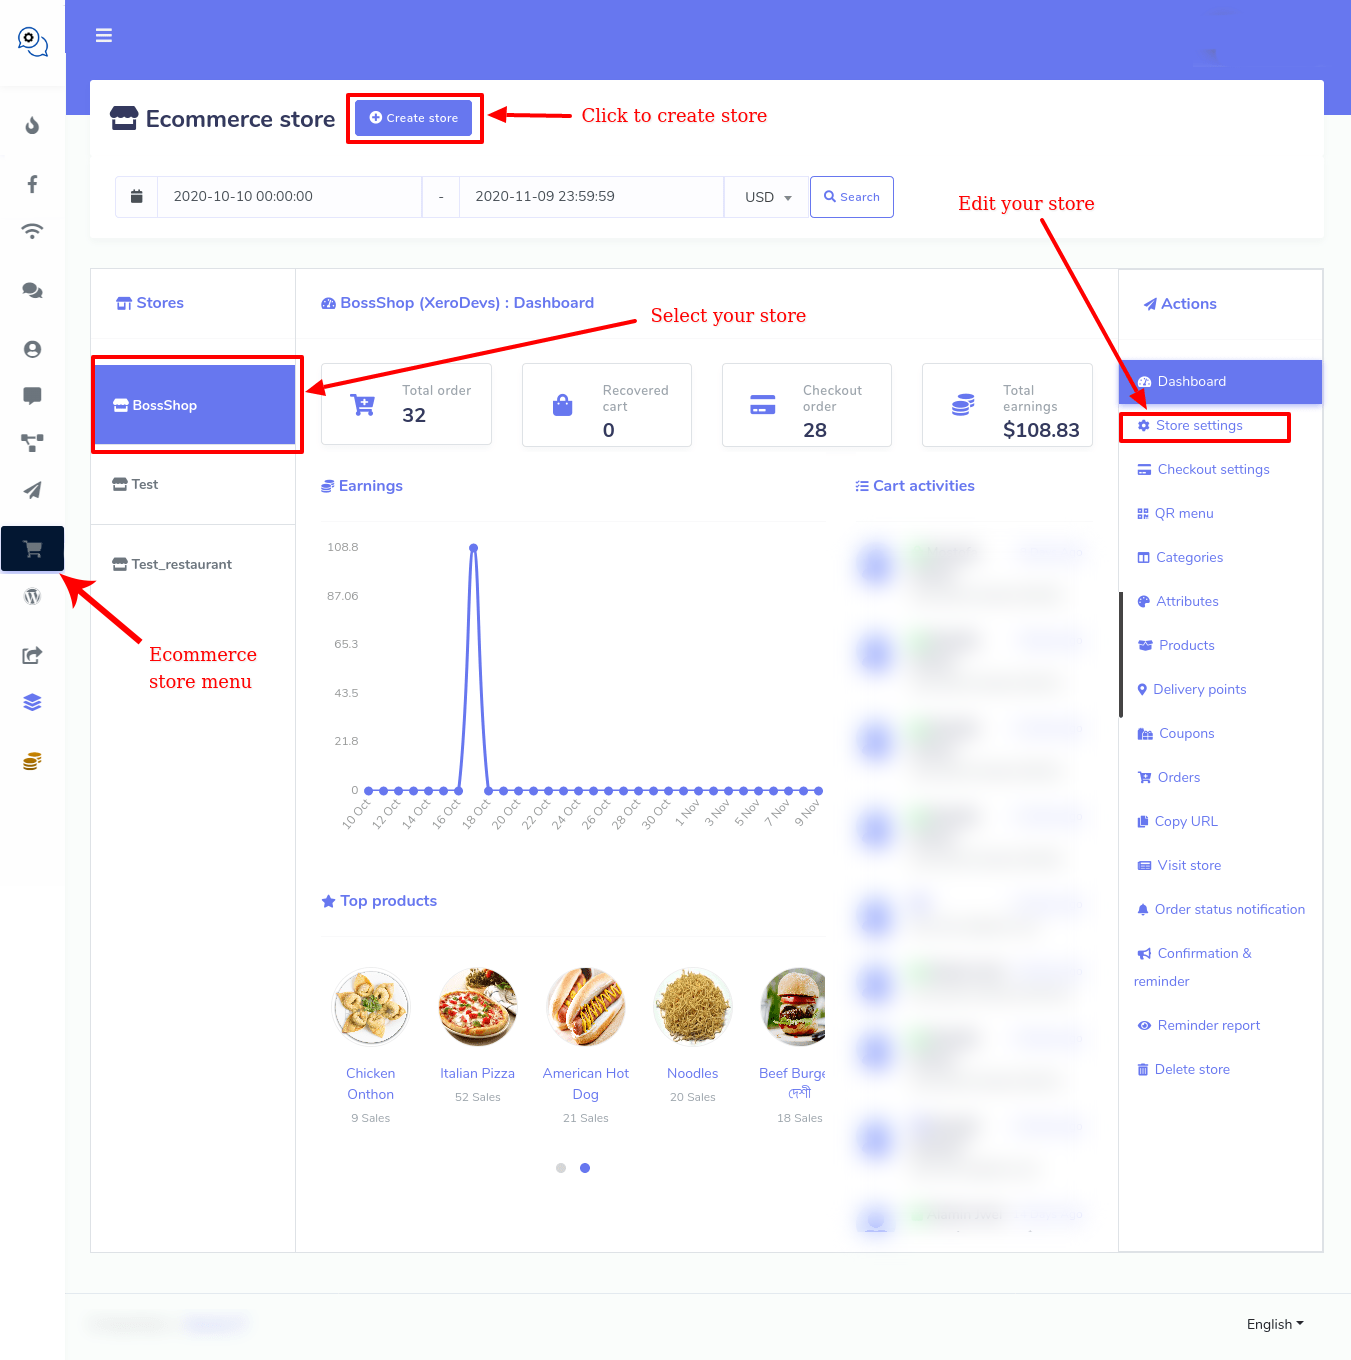
Well, to create a new store, you have to click on the Create store button first. Instantly, a form will appear. You have to fill out the form– selecting a Facebook Page, providing some initial information about the virtual restaurant, writing down the Terms of service and refund policy, and uploading the logo and favicon.
In the form, there is a special box called local that needs a bit of explanation. Just as you click on the box, a drop-down menu of some languages will appear– you can select any language. Your virtual restaurant will open in the language that you select. For example, if you select English, your virtual restaurant will appear to your customers in English.
There are two boxes called, ‘Facebook Pixel Id’ and ‘Google Analytics Id’ that also need a bit of explanation.
Facebook Pixel Id is a piece of code you can place inside the source code of your website. The code automatically can collect and store data of your website visitors. Because of Facebook Pixel code, you can run Facebook Ads for targeted audiences who have visited your website before using the data. Please visit the link to see how to create Facebook Pixel Id.
Google Analytics Id also works like Facebook Pixel Id to re-target your website visitors in the Google ads. Please visit the link to learn how to create Google Analytic Id.
Anyway, after filling out the form, click on the Create store button at the bottom of the form. If you fill up every compulsory field properly, a pop-up box will appear with a successful message.


